Search

Custom Search
Tuesday, 31 January 2012
Update to IES lighting..
I am in the mood of exploring and rendering. Here is the update render of my IES lighting.

Sunday, 29 January 2012
WIP: Tutorial Definitive Guide for Vray Lighting: "All about IES Lighting"
Here is my latest render for the scene I want to use for my Definitve guide "All about IES lighting".
~sofa, accessories, initial model by Rick Puyat Regala,
~pillow by Tiago Crisostomo
~sofa, accessories, initial model by Rick Puyat Regala,
~pillow by Tiago Crisostomo
Saturday, 21 January 2012
Tutorial: Modeling of a Pillow
Before I will go for a week of vacation, I think its nice to leave you with this tutorial of a pillow.
First of all, I want to introduce this Facebook page "SketchUp Texture" in which Rosanna Mataloni has put up. I am now working together with Rosanna on this page. So please visit us and download great textures, links and tutorials. I am using my textures that came directly from this page.
The texture of the pillow can be downloaded on an album called rectangular pillows HERE
This tutorial is an intermediate to advanced SketchUp tutorial, so I expect you during this time that you know the tools and scripts I am using.
Step 1. Load Texture, trace the outline using line tool. you dont have to be precised here.

Step 2. Delete the outer face

Step 3. Use Push/pull tool to extrude the face (Be sure the texture is projected texture). TIP 1. It is better to have a rectangle face on one side as dummy and apply the sample texture here. If you jumbled your texture in organic modeling, you can always sample this face.

Step 4. Use Offset tool and offset the outline.

Step 5. Erase unwanted lines from the corner. you just need the middle face.

Step 6. Use autofold. (Move tool + Alt) move the face upward (You can repeat step 5 and 6 for more detailing.

Step 7. Before erasing the underneath face, you need to select the outline and copy it and place it on one side you can also copy the face. We will use this as tubular trim around the pillow. Now erase the underneath face before applying SAS plugin.

Step8. Use Subdivide and Smooth plugin and use Iteration 1 (The texture will be jumbled)

Step9. Reapply the texture using (right click mouse +Alt). TIP 2 - You can reapply the texture at once by right clicking and holding the Alt key at the same time.

Step 10. Use sculpt tools to relax, push and pool some faces, my brush settings below.

Step 10: Here is my sculpted model. (Create a component)

Step 11. Once the component was created, copy this and mirror it using scale tool.

Step 12. Before I made a component, I copied the underneath side of my model, Create a face and use Subdivide and Smooth with 1 iteration. Use line to cylinder to create the tube. Move this created tube in between the two components.

Step13. Explode the whole model. Select some areas and move a bit these areas using scale tool. This way you can vary the pillow further.

Step 14. Finally, smooth again Smooth and Subdivide with 1 iteration. This will be your final model. Re-apply again the texture using Step 9.

Step15. Correcting the texture. You will see that there are some flaws on the texture, the white outline of the texture model is showing.

Step 16. Edit the image using Photoshop. Under Edit tab, look at the icon "box with orange arrow". Click this to edit your texture in Photoshop. TIP 3. To automatically open Photoshop as your post processing. Go to "Preference/ Application/ the choose the Photoshop.exe to load here)

Step17. Use patch tool, clone stamp tool to reapply some texture to the white areas. I will do a separate tutorial with this one.

Here is my completed texture. Exit and save the image. This image will be saved in the TEMP folder.

You will see that those white stuff were gone.

Here is the rendered image.

Thursday, 19 January 2012

Monday, 16 January 2012
Next MTM Collaboration
Balancing between quality and speed is hard to accomplished. In this scene modeled and designed by Jonathan Ignas, I tried and explored possibility to achieve this. Here is the attempt done in less than an hour.


Sunday, 1 January 2012
Looking Back.. My first render with Vray SketchUp and Podium
I was browsing some of my old photos and I came up to see some of my oldest output with VRAY SketchUp and Podium engines. Honestly, I grinned with smile. I still remember those happy days of producing renders, I felt like Superman... Of course I could see that other newbies have far far more respectable output with these. On the other hand specially with Vray, we do not even have Manual then and the funny ASGVIS logo was still there.
Here is one of my very first output with Vray Sketchup1.0. Notice the logo. This was the first beta trial of Vray SketchUp with the funny Asgvis logo to the right left corner. I remember at that time too, I could not control the mapping. If you will see the painting, it was actually repeating. It should not. The pillow in the middle should have mapping too, but I cant control it. Anyhow it was nice to remember.
This is one of my first trial with materials. Trying to see the effect of reflection and refraction.

I think this was really one of my first try with Vray SketchUp 1.0 with respectable output. Notice the painting, I was actually stuck with UV... it drove me crazy. I actually gave up VRAY SketchUp for around three months after my trial expired.


With podium, the following renders were my very first render and posted in the forums...This was I beleive in year 2003. I believe, I was still using SKetchUp 4.0 by @Last not even Google at that time.


 I was actually very comfortable with Podium Rendering engine. Most of my personal projects and designs were visulized using SkethUp and Podium Render.


I returned with Vray SketchUp after they update it and I had a chance to try the next version. This time they removed the watermark. After joining the ASGVIS forums and ability to control UV. The below render was the one that attracted me with VraySketchUp.
Rendered with VraySu 1.33

Compared with my previous render with Podium

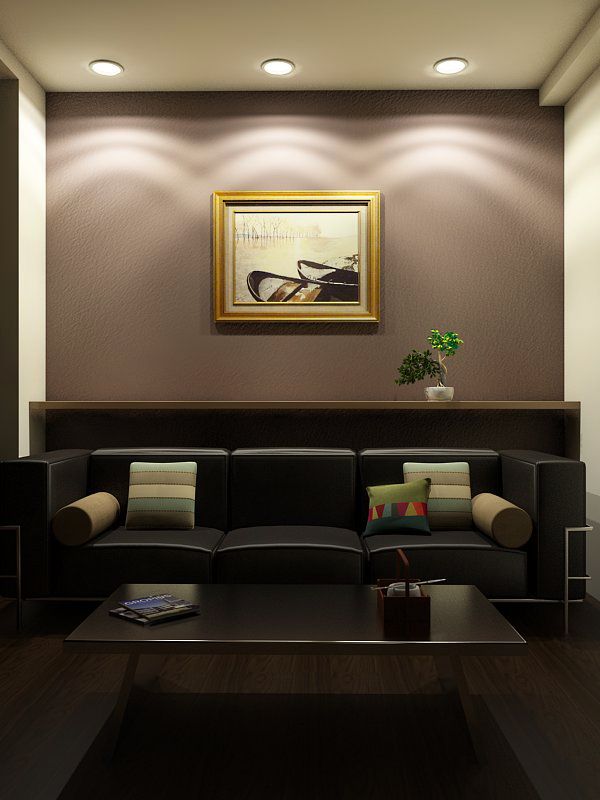
From then I slowly became more used to with Vray SketchUp. Below were some of my renders (actual projects, hobbies and test render)

Only Emissive Lighting ( this is the render where I found that increasing the HSPH subdivision could actually removed those splotches when using emissive materials.


Thang Loi Hotel Desing presentation using Vray SketchUp


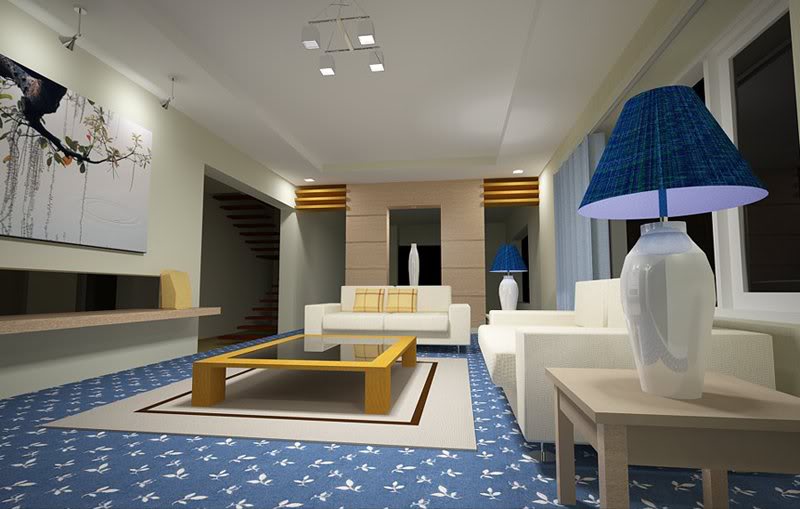
A villa design

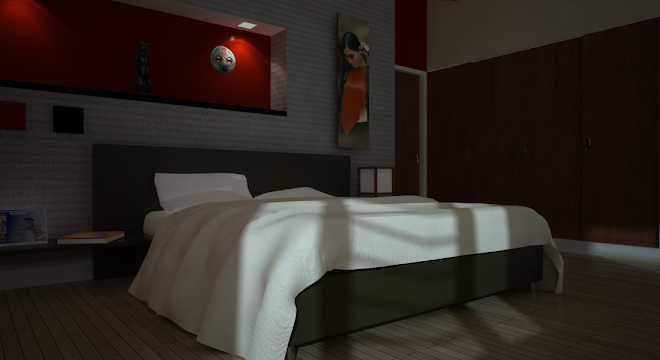
Hotel Bedroom Design
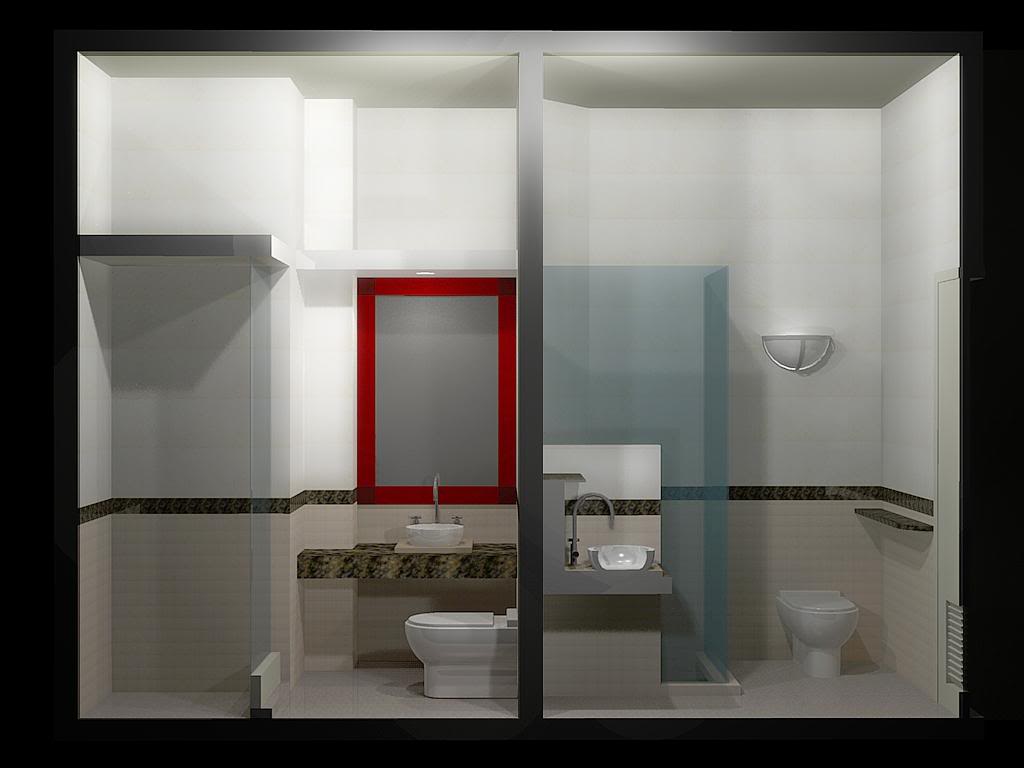
 Just a test
 Lighting Test.

Here is one of my very first output with Vray Sketchup1.0. Notice the logo. This was the first beta trial of Vray SketchUp with the funny Asgvis logo to the right left corner. I remember at that time too, I could not control the mapping. If you will see the painting, it was actually repeating. It should not. The pillow in the middle should have mapping too, but I cant control it. Anyhow it was nice to remember.
This is one of my first trial with materials. Trying to see the effect of reflection and refraction.

I think this was really one of my first try with Vray SketchUp 1.0 with respectable output. Notice the painting, I was actually stuck with UV... it drove me crazy. I actually gave up VRAY SketchUp for around three months after my trial expired.


With podium, the following renders were my very first render and posted in the forums...This was I beleive in year 2003. I believe, I was still using SKetchUp 4.0 by @Last not even Google at that time.


I returned with Vray SketchUp after they update it and I had a chance to try the next version. This time they removed the watermark. After joining the ASGVIS forums and ability to control UV. The below render was the one that attracted me with VraySketchUp.
Rendered with VraySu 1.33

Compared with my previous render with Podium

From then I slowly became more used to with Vray SketchUp. Below were some of my renders (actual projects, hobbies and test render)

Only Emissive Lighting ( this is the render where I found that increasing the HSPH subdivision could actually removed those splotches when using emissive materials.


Thang Loi Hotel Desing presentation using Vray SketchUp

A villa design

Hotel Bedroom Design


Subscribe to:
Posts (Atom)
Bedroom Interior Rendering