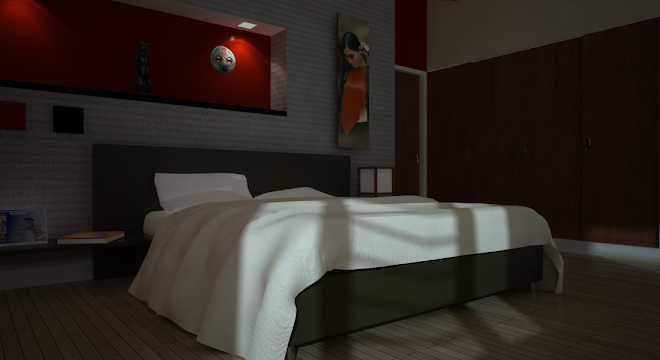
Some of the channels in Vray SketchUp includes:
- Diffuse - The pure diffuse surface color. I will say the positive space
- Alpha - Alpha transparency. I should say the negative space
- Athmosphere -The atmospheric effects. honestly still do not know how this work in Vray Sketchup.
- RGB - this is the render image minus the negative space. This is the RGB color of the Diffuse.
- Reflection - The pure surface reflection before it's multiplied by the reflection filter color.
- Refraction - The pure surface refraction before it's multiplied by the refraction filter color.
- Self Illumination - The self-illumination of the surface.
- Shadow - The diffuse light that was blocked by other objects.
- Specular - The surface specular hilights.
- Raw Light - The raw diffuse direct illumination before it's multiplied by the diffuse surface color.
- Raw GI - The raw diffuse global illumination (not multiplied by the diffuse surface color). Only present if Global illumination is enabled.
- Caustics - The caustics on the material. Only present when the Caustics option of V-Ray is enabled. This channel does not include GI caustics.
- MAterial ID - The material ID of the object.
- Zdepth - The z-depth of the surface.
There are a lot more channels like: Raw Reflection, wire, normals, matte shadow, total lights, bunp normal, RSS, Raw reflection. All of these are design to tweak a particular channel selection during post processing.
I often you Zdpeth Map to simulate the Depth of Field like in the tutorial HERE.
I want to create tutorial on all these channels but perhaps later. For the mentime, I wan to share some of the old resources at Vray SKetchup froum how users use this.
Here is Freeagent approach even with the old version of Vray Sketchup.

Material ID by Andy Orban
Material ID channel tutorial
Having the material ID channel has been an immense help in compositing images in post-process. This is a tool that allows you to mask out a material and replace it with a suitable texture. I thought I would share my steps in making this image using the material ID and Alpha channel.

Step 1. select material ID color. In the material editor, select the material you want to mask, and pick a color other than black. Also, use a color for the diffuse layer that is low saturation, this will be important later.

Step 2. Select the material ID channel in your VFB dialogue. I also have the alpha channel selected since I am putting my own sky behind the image as well.

Step 3. When you render your image, save the image as a “.png”, and you will have three files. Your rgb color map, an alpha map (which is also the transparency in your first png), and a material_id map. (color and material ID shown below:)


Step 4. Open the color and material ID images into your image editor (one that can manipulate and overlap layers or levels) I am using Photoshop, so the rest of this is referencing PS.
Step 5. Select the texture to use as your background and open that in PS as well

Step 6. Arrange the three images so that material ID is on top, then color image is next, and the background is at the bottom of the stack. Make a copy of your color image.
Step 7. Make a selection your material ID color on the first layer by using the “magic wand” tool in PS, set to a tolerance of 5. Then choose the color layer in your layer window and run the following command: Layer -> Layer Mask -> Hide selection.
(If you turn off the copied color layer and material id layer, you will see this:)
Step 8. Make a selection of the black color on the material ID layer. Choose the copy of the color layer in your layer window, then run the following command: Layer -> Layer Mask -> Reveal selection. Next turn off (or delete) your material ID layer. Change the transparency of the copied color layer to “multiply” – this will cover the background with the shadow pattern from the render. If you have a color that is low saturation, the shadows should look fine. If you have a strong saturation, you may need to reduce the saturation on this layer so the colors are more normal. Adjust transparency as needed (mine is at 74%)
Step 9. Create a new layer and airbrush in some shadows under the bushes.

Step 1. select material ID color. In the material editor, select the material you want to mask, and pick a color other than black. Also, use a color for the diffuse layer that is low saturation, this will be important later.

Step 2. Select the material ID channel in your VFB dialogue. I also have the alpha channel selected since I am putting my own sky behind the image as well.

Step 3. When you render your image, save the image as a “.png”, and you will have three files. Your rgb color map, an alpha map (which is also the transparency in your first png), and a material_id map. (color and material ID shown below:)


Step 4. Open the color and material ID images into your image editor (one that can manipulate and overlap layers or levels) I am using Photoshop, so the rest of this is referencing PS.
Step 5. Select the texture to use as your background and open that in PS as well

Step 6. Arrange the three images so that material ID is on top, then color image is next, and the background is at the bottom of the stack. Make a copy of your color image.
Step 7. Make a selection your material ID color on the first layer by using the “magic wand” tool in PS, set to a tolerance of 5. Then choose the color layer in your layer window and run the following command: Layer -> Layer Mask -> Hide selection.
(If you turn off the copied color layer and material id layer, you will see this:)

Step 8. Make a selection of the black color on the material ID layer. Choose the copy of the color layer in your layer window, then run the following command: Layer -> Layer Mask -> Reveal selection. Next turn off (or delete) your material ID layer. Change the transparency of the copied color layer to “multiply” – this will cover the background with the shadow pattern from the render. If you have a color that is low saturation, the shadows should look fine. If you have a strong saturation, you may need to reduce the saturation on this layer so the colors are more normal. Adjust transparency as needed (mine is at 74%)
Step 9. Create a new layer and airbrush in some shadows under the bushes.