Search

Custom Search

Welcome to My Blogsite

You will find on this blog a collection of my work mostly done in Google SketchUp and Rendered in either Vray for Sketchup, Hypershot, Vray Max, LightUp and Podium.

Download Free Google SketchUp
Download Vray SKetchUp (you need to register in order to download)
Download Podium Evaluation copy Do you want to try Bunkspeed Shot? Click HERE.


Showing posts with label Tutorial. Show all posts

Monday, 23 July 2012

Different Ways how to produce large render output

Because of the memory limitation of SketchUp (32 bit), Vray SketchUp is also affected by it. Whenever we try to produce huge output, say 8000 pixel width, surely we end up choking the memory limit of SketchUp and thus resulting VRAY SU to crash.. Sounds familiar right?

I want to share here at least three different options on how to compensate this limitation.


Option 1: Using the vrimage and EXR output. I have done a tutorial for this one HERE.
Even with this with higher settings I still crash my Vray Su.


Option 2: Using render region. Here is how I do it.

Step 1: Render in low resolution and small output size. Here I used low Image sampler and output first
  

Step 2: Crank up the Irradiance Map and Light Cache settings. See the render...


 Step 3: Saved the Irradiance and Light Cache maps. Then load the save maps in both irradiance and light cache again this time the mode should be "From File". You also increase the Image sampler and lower the color treshold for smoother image.

Save LC map
Save Irradiance Map


Increase Image sampler
Load Maps again


Step 4: Increase the Vray output.. Here I will do 3000 x 1403px. Hit Render. Now wait for the Vray Frame Buffer to appear once it appeared stop the rendering.


Step 5: Use the render region


In this render I selected the 1/4th part of the render image in the frame buffer.


Step 5: Choose the next area: After render choose the next area. Then the next one. You may wish to save every file then compose them in Photoshop. If you are lazy in saving you can finish the rendering using this technique.


Option 3: Use Image Enlarger.

There is a free program that you can download HERE called Smilla Enlarger. For me this is a very good alternative. It's faster and at the same time simpler.

Produce a smaller render output, then enlarge it using this software.


Cheers!

Nomeradona

Saturday, 21 January 2012

Tutorial: Modeling of a Pillow

Before I will go for a week of vacation, I think its nice to leave you with this tutorial of a pillow.

First of all, I want to introduce this Facebook page "SketchUp Texture" in which Rosanna Mataloni has put up. I am now working together with Rosanna on this page. So please visit us and download great textures, links and tutorials. I am using my textures that came directly from this page.

The texture of the pillow can be downloaded on an album called rectangular pillows  HERE

This tutorial is an intermediate to advanced SketchUp tutorial, so I expect you during this time that you know the tools and scripts I am using. 

Step 1. Load Texture, trace the outline using line tool. you dont have to be precised here.  


Step 2. Delete the outer face


Step 3. Use Push/pull tool to extrude the face (Be sure the texture is projected texture). TIP 1. It is better to have a rectangle face on one side as dummy and apply the sample texture here. If you jumbled your texture in organic modeling, you can always sample this face.


Step 4. Use Offset tool and offset the outline.


Step 5. Erase unwanted lines from the corner. you just need the middle face.


Step 6. Use autofold. (Move tool + Alt) move the face upward (You can repeat step 5 and 6 for more detailing.


Step 7. Before erasing the underneath face, you need to select the outline and copy it and place it on one side you can also copy the face. We will use this as tubular trim around the pillow. Now erase the underneath face before applying SAS plugin.


Step8. Use Subdivide and Smooth plugin and use Iteration 1 (The texture will be jumbled)


Step9. Reapply the texture using (right click mouse +Alt). TIP 2 - You can reapply the texture at once by right clicking and holding the Alt key at the same time.


Step 10. Use sculpt tools to relax, push and pool some faces, my brush settings below.

Step 10: Here is my sculpted model. (Create a component)


Step 11. Once the component was created, copy this and mirror it using scale tool.


Step 12. Before I made a component, I copied the underneath side of my model, Create a face and use Subdivide and Smooth with 1 iteration. Use line to cylinder to create the tube. Move this created tube in between the two components.


Step13. Explode the whole model. Select some areas and move a bit these areas using scale tool. This way you can vary the pillow further.


Step 14. Finally, smooth again Smooth and Subdivide with 1 iteration. This will be your final model. Re-apply again the texture using Step 9.

Step15. Correcting the texture. You will see that there are some flaws on the texture, the white outline of the texture model is showing.

Step 16. Edit the image using Photoshop. Under Edit tab, look at the icon "box with orange arrow". Click this to edit your texture in Photoshop. TIP 3. To automatically open Photoshop as your post processing. Go to "Preference/ Application/ the choose the Photoshop.exe to load here)


Step17. Use patch tool, clone stamp tool to reapply some texture to the white areas. I will do a separate tutorial with this one.


Here is my completed texture. Exit and save the image. This image will be saved in the TEMP folder.


You will see that those white stuff were gone.


Here is the rendered image.

Saturday, 26 November 2011

Tutorial: How to model Ifugao Mask in Google SketchUp

I want to share here how I model this mask. This is an Ifugao Mask from the Northern part of Philippines. This will be our reference image in this tutorial.

Photobucket

Step 1: Trace the outline
Trace the outline of th mask, tracing can be faceted. It does not matter.See the image below.

Photobucket

Step 2: Push Pull
After tracing the whole image, we can push pull it with desired height. Tracing images will always have projected texture. If projected texture in not on then right click and tick projected texture.

Photobucket

Step 3: Offset tool
Select the outside boundary of the top face and use the offset tool. (see image below).

Photobucket


Step 4: Autofold
To enable autofold function, select the face and then use the move tool and at the same time press Alt.
 
Photobucket


Step 5: Trace the eyes.
I traced the eye like the below image. Then I created the hole.

Photobucket

Then push  the other part like the below image.
Photobucket

I then move some of the below lines to the upper lines to create some slopes. I did the same thing with the other eye and the mouth.

Photobucket


Step 6. Tracing the nose
Next I traced the nose. (see the image below) 

Photobucket

I push again the whole thing up (see image)
Photobucket

I selected some of the lines (see highlighted lines below)
Photobucket

and move them to the below lines.
Photobucket

Here is so far the model.

Photobucket

Step 7: Tracing the details. 
I traced some of the details and pushed them a bit. now we are ready to subdivide. I would like you to notice the line near the mouth.

Photobucket

This is the subdivided mesh. Notice the abruptness of the subdivision near the mouth. This because there is big area below the mouth and the distance between the edge of the mouth and side is too small. The lines diverged on that area whilst you can see some abruptness.

Photobucket

Next I  added another line. To separate that area with the rest.
Photobucket

Now the subdivision is smoother.
Photobucket

Here is the complete subdivided model
Photobucket

Here is the wireframe

Photobucket

I painted the texture.
Photobucket

Here is the render.
Photobucket

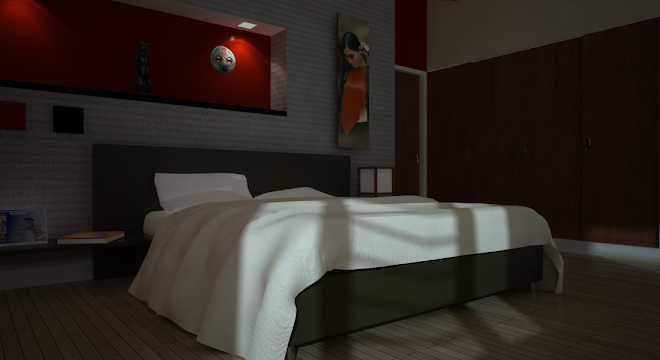
Bedroom Interior Rendering

Bedroom Interior Rendering