Before I will go for a week of vacation, I think its nice to leave you with this tutorial of a pillow.
First of all, I want to introduce this Facebook page "SketchUp Texture" in which Rosanna Mataloni has put up. I am now working together with Rosanna on this page. So please visit us and download great textures, links and tutorials. I am using my textures that came directly from this page.
The texture of the pillow can be downloaded on an album called rectangular pillows HERE
This tutorial is an intermediate to advanced SketchUp tutorial, so I expect you during this time that you know the tools and scripts I am using.
Step 1. Load Texture, trace the outline using line tool. you dont have to be precised here.
Step 2. Delete the outer face
Step 3. Use Push/pull tool to extrude the face (Be sure the texture is projected texture). TIP 1. It is better to have a rectangle face on one side as dummy and apply the sample texture here. If you jumbled your texture in organic modeling, you can always sample this face.
Step 4. Use Offset tool and offset the outline.
Step 5. Erase unwanted lines from the corner. you just need the middle face.
Step 6. Use autofold. (Move tool + Alt) move the face upward (You can repeat step 5 and 6 for more detailing.
Step 7. Before erasing the underneath face, you need to select the outline and copy it and place it on one side you can also copy the face. We will use this as tubular trim around the pillow. Now erase the underneath face before applying SAS plugin.
Step8. Use Subdivide and Smooth plugin and use Iteration 1 (The texture will be jumbled)
Step9. Reapply the texture using (right click mouse +Alt). TIP 2 - You can reapply the texture at once by right clicking and holding the Alt key at the same time.
Step 10. Use sculpt tools to relax, push and pool some faces, my brush settings below.
Step 10: Here is my sculpted model. (Create a component)
Step 11. Once the component was created, copy this and mirror it using scale tool.
Step 12. Before I made a component, I copied the underneath side of my model, Create a face and use Subdivide and Smooth with 1 iteration. Use line to cylinder to create the tube. Move this created tube in between the two components.
Step13. Explode the whole model. Select some areas and move a bit these areas using scale tool. This way you can vary the pillow further.
Step 14. Finally, smooth again Smooth and Subdivide with 1 iteration. This will be your final model. Re-apply again the texture using Step 9.
Step15. Correcting the texture. You will see that there are some flaws on the texture, the white outline of the texture model is showing.
Step 16. Edit the image using Photoshop. Under Edit tab, look at the icon "box with orange arrow". Click this to edit your texture in Photoshop. TIP 3. To automatically open Photoshop as your post processing. Go to "Preference/ Application/ the choose the Photoshop.exe to load here)
Step17. Use patch tool, clone stamp tool to reapply some texture to the white areas. I will do a separate tutorial with this one.
Here is my completed texture. Exit and save the image. This image will be saved in the TEMP folder.
You will see that those white stuff were gone.
Here is the rendered image.
Search
Custom Search
Welcome to My Blogsite
You will find on this blog a collection of my work mostly done in Google SketchUp and Rendered in either Vray for Sketchup, Hypershot, Vray Max, LightUp and Podium.
Download Free Google SketchUp Download Vray SKetchUp (you need to register in order to download)
Download Podium Evaluation copy Do you want to try Bunkspeed Shot? Click HERE.
Download Free Google SketchUp Download Vray SKetchUp (you need to register in order to download)
Download Podium Evaluation copy Do you want to try Bunkspeed Shot? Click HERE.
Showing posts with label nomeradona. Show all posts
Saturday, 21 January 2012
Monday, 21 November 2011
Tutorial: How to model folded T-shirt in Google SketchUp
Modeling clothing in SketchUp is not difficult at all. Here is a simple quick workflow on how to do it quickly.
One of the best thing in SkechUp is the ability to project the image.
Step 1: Importing reference image.

Step 2: Tracing the outside boundary using line tool
All you have to do is to use line tool and trace the boundary of the Tshirt, then
pulling it with push pull tool.

Step 3. Adding subdivision
To add subdivision, simply copy the bounding edges (not the face) and paste it twice (see the image below)

Step 4: Re-scale the top and bottom face.
Rescale the top and bottom face. Hold the control key so that the scale anchor point will be in the middle.

You can also use round corner "bevel face" by Fredo here.
Step 5: Beveled Faces

Step 6: Paint Projected image
You can now paint the model using projected image option. This is important for tracing the other parts of the T-shirt.

Step 7: Repositioning edges
In the image below, I repositioned some of the lines to follow the contour of shirt.

Step 8: Tracing the neckline
Here I traced the neckline.

Step 9: Push pulling some parts of the neckline
After tracing the neckline and offsetting it, I used push pull tool to add depth and height. Here you can see the different heights without the projected image.

Step 10: Tracing the sleeve
Trace the sleeve and push pull one more time.

Step 11: Reposition again some of the lines

Here is the Raw Model without smoothing. Generally you can even use this with projected image and soften edges. If your model is far from the camera, this is more than enough to fool the viewers eye.

Step 12: Smoothing
For high poly models that you want to use even near the camera, we can further sub-smooth the models. All we need to do it to select the model and subdivide it with 2 iterations.

Here is the result

Step 13: Further sculpting
Once again using the sculpt tool script made by BTM. Download it for free HERE


Here is the finish model

RENDERED VIEWS


Hope this will encourage you to model and not keep on looking everywhere for models.
One of the best thing in SkechUp is the ability to project the image.
Step 1: Importing reference image.
Step 2: Tracing the outside boundary using line tool
All you have to do is to use line tool and trace the boundary of the Tshirt, then
pulling it with push pull tool.
Step 3. Adding subdivision
To add subdivision, simply copy the bounding edges (not the face) and paste it twice (see the image below)
Step 4: Re-scale the top and bottom face.
Rescale the top and bottom face. Hold the control key so that the scale anchor point will be in the middle.
You can also use round corner "bevel face" by Fredo here.
Step 5: Beveled Faces
Step 6: Paint Projected image
You can now paint the model using projected image option. This is important for tracing the other parts of the T-shirt.
Step 7: Repositioning edges
In the image below, I repositioned some of the lines to follow the contour of shirt.
Step 8: Tracing the neckline
Here I traced the neckline.
Step 9: Push pulling some parts of the neckline
After tracing the neckline and offsetting it, I used push pull tool to add depth and height. Here you can see the different heights without the projected image.
Step 10: Tracing the sleeve
Trace the sleeve and push pull one more time.
Step 11: Reposition again some of the lines
Here is the Raw Model without smoothing. Generally you can even use this with projected image and soften edges. If your model is far from the camera, this is more than enough to fool the viewers eye.
Step 12: Smoothing
For high poly models that you want to use even near the camera, we can further sub-smooth the models. All we need to do it to select the model and subdivide it with 2 iterations.
Here is the result
Step 13: Further sculpting
Once again using the sculpt tool script made by BTM. Download it for free HERE
Here is the finish model
RENDERED VIEWS
Hope this will encourage you to model and not keep on looking everywhere for models.
Labels:
Modeling,
nomeradona,
Tutorial
Wednesday, 16 November 2011
Video Tutorial: Modeling traditional Filipino Stove (Kalan)
Here is a video tutorial on how I did my traditional Filipino stove.
Labels:
nomeradona,
video tutrorial
Thursday, 20 October 2011
Lighting With Vray Sketchup, Definitive Guide 3 PArt 1
This is a two part tutorial of my third tutorial series with Lighting with Vray Sketchup. This third lighting tutorial focuses with "Studio Lighting". For those of you who want to see my other tutorials please click HERE.
Introduction
In this tutorial we will see how to set up a simple studio scene; will look at how professional photographers set up their studio lighting; and finally how to simulate these lighting using Vray rectangular and omni lights.
Step 1: Modeling the studio scene.
I will be using this profile for my studio background wall
Next, I created an arc with 48 sides
I used the follow me tool to create this.
I used soften edges to smoothen the whole thing.
I imported a low resolution model from the 3D Warehouse and placed it in the middle of the scene. The model was further smoothed using "smooth and subdivide script". Download this Motorbike HERE
Here is the close up camera view.
Step 2: Studio Lighting
One of the subject I teach in the school is Digital Photography class. In our school we love to play studio lighting. For those of you who want to know more, how professional photographer set-up their studio lighting, here is my number one resource SITE for studio set up. Through this site, I have learned so much about studio lighting.
In this site, they explain clearly about different equipments like soft boxes, nbarn light, diffusers etc. They also focus on the theory of light in general. So if you are an avid photographer, this is a must site to visit.
There are different ways to set up studio lights. It depends of what mood and what type of lighting you want to accomplish; ghetto, high key, low key etc. In this particular tutorial, I will be focusing on common "high key lighting set-up.
The image above represents the common high key lighting set-up. The subject is in the middle; two background lights shooting on the white background; the main soft box light in front; and the secondary light reflector on the right.
Of course there are different ways to set up studio lighting, but this thing wont be covered in this tutorial.
The above layout represents the kind of lighting I want to do in this tutorial while the image below represents these lighting elements with VRAY Lights.
The image below shows the 3D studio set-up. The main light is a huge Vray rectangular light. The strip lighting on the right are four different vray rectangular lights (invisible), while the strip light to the left is a single Vray rectangular light (remodeled). Finally the Omni lighting (affect specular, shadow were untick) serves as background lighting.
Note: The bigger the area of the Vray rectangular light the softer the shadow.
Step 3: Vray Light Settings
Next is we need to set the parameters of our lighting. I put the main light multiplier @5, secondary strip lights@3 and background omni light @1.
Download the VISOPT that I am using in this render.
Here are the render images. Below shows a birds eye view on the effects of lighting to the main model.

Here is a render with my normal camera view set-up. In the render below the specular effect of strip lighting is very obvious.

To extend exploring this tutorial, we can also experiment by changing the light colors just light gels that they put in a typical photographic studio lighting.


I hope this tutorial is useful. Second part of this tutorial is coming soon.
Nomeradona
Introduction
In this tutorial we will see how to set up a simple studio scene; will look at how professional photographers set up their studio lighting; and finally how to simulate these lighting using Vray rectangular and omni lights.
Step 1: Modeling the studio scene.
I will be using this profile for my studio background wall
| Studio Scene Profile |
Next, I created an arc with 48 sides
| 48 Sides arc drawn |
I used the follow me tool to create this.
| Follow me tool was used |
I used soften edges to smoothen the whole thing.
| Soften Edges |
I imported a low resolution model from the 3D Warehouse and placed it in the middle of the scene. The model was further smoothed using "smooth and subdivide script". Download this Motorbike HERE
| Main subject imported and placed in the middle |
Here is the close up camera view.
Step 2: Studio Lighting
One of the subject I teach in the school is Digital Photography class. In our school we love to play studio lighting. For those of you who want to know more, how professional photographer set-up their studio lighting, here is my number one resource SITE for studio set up. Through this site, I have learned so much about studio lighting.
In this site, they explain clearly about different equipments like soft boxes, nbarn light, diffusers etc. They also focus on the theory of light in general. So if you are an avid photographer, this is a must site to visit.
| Light Theory |
| Using typical soft box |
There are different ways to set up studio lights. It depends of what mood and what type of lighting you want to accomplish; ghetto, high key, low key etc. In this particular tutorial, I will be focusing on common "high key lighting set-up.
| Typical High Key lighting set-up |
The image above represents the common high key lighting set-up. The subject is in the middle; two background lights shooting on the white background; the main soft box light in front; and the secondary light reflector on the right.
Of course there are different ways to set up studio lighting, but this thing wont be covered in this tutorial.
| Set up to be used in this tutorial |
The above layout represents the kind of lighting I want to do in this tutorial while the image below represents these lighting elements with VRAY Lights.
| Lighting set-up represented by Vray Lights |
Note: The bigger the area of the Vray rectangular light the softer the shadow.
| The set-up |
Step 3: Vray Light Settings
Next is we need to set the parameters of our lighting. I put the main light multiplier @5, secondary strip lights@3 and background omni light @1.
The image above shows my lighting settings.
Here are the render images. Below shows a birds eye view on the effects of lighting to the main model.
Here is a render with my normal camera view set-up. In the render below the specular effect of strip lighting is very obvious.
To extend exploring this tutorial, we can also experiment by changing the light colors just light gels that they put in a typical photographic studio lighting.
I hope this tutorial is useful. Second part of this tutorial is coming soon.
Nomeradona
Labels:
nomeradona,
Vray Lighting
Subscribe to:
Posts (Atom)
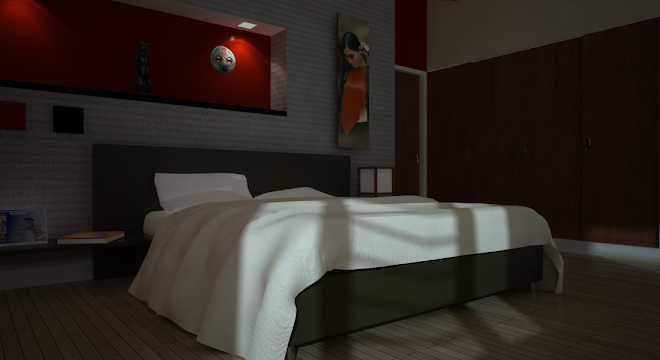
Bedroom Interior Rendering