Revisiting Fotosketcher.
Search
Custom Search
Welcome to My Blogsite
You will find on this blog a collection of my work mostly done in Google SketchUp and Rendered in either Vray for Sketchup, Hypershot, Vray Max, LightUp and Podium.
Download Free Google SketchUp Download Vray SKetchUp (you need to register in order to download)
Download Podium Evaluation copy Do you want to try Bunkspeed Shot? Click HERE.
Download Free Google SketchUp Download Vray SKetchUp (you need to register in order to download)
Download Podium Evaluation copy Do you want to try Bunkspeed Shot? Click HERE.
Wednesday, 7 September 2011
Monday, 5 September 2011
Tip:
The frame buffer is one of the most disregarded tool in Vray SketchUp, but it is actually a powerful tool. I admit, I am one of the culprit who have not explored the frame buffer, and in the latest Vray SKetchUp you can even see some more additional tools. In this tip, I will quickly show one of my favorite: the Color Correction tool.
Here is the frame buffer. Once the color correction icon has been clicked, the color correction tool will appear. (see below image)
I will show you two image. You will see the great difference between the two images by using this tool.
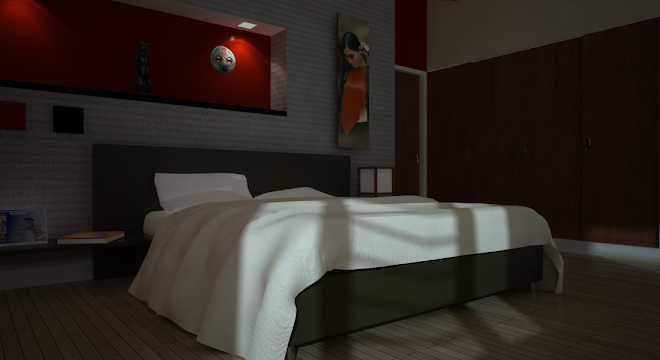
First image.. original render output of Vray SketchUp
Second Image: Using color correction tool, I increased the exposure to +1. See the difference.
Here is the frame buffer. Once the color correction icon has been clicked, the color correction tool will appear. (see below image)
I will show you two image. You will see the great difference between the two images by using this tool.
First image.. original render output of Vray SketchUp
Second Image: Using color correction tool, I increased the exposure to +1. See the difference.
Labels:
Color correction tool,
Frame buffer,
Tip
Saturday, 3 September 2011
DOF test
Exploring and experimenting Vray SketchUp Depth of Field. I am still very unhappy.
It's a bit noisy. Now trying to reduce noise by lowering the color threshold.
Thursday, 1 September 2011
Tutorial: Making the Smart Tree Smarter
Alot of the SketchUp Vray users know probably Andeciulala. He is the guy who became famous with his Fake IES lighting with the old version of Vray 1.05.33. He was also known with this "smart tree" in 3D Warehouse.
Well! Smart tree indeed!
Many people had downloaded this tree and I have seen it many times with Exterior render. The problem; too many people are using it.
This tutorial entitled "Making the smart tree, smarter" is a workaround on how to use the smart tree and how to create variance of this easily using Sketchup and Photoshop.
Without further explanation, let me go to the steps.
Softwares: Sketchup 8, Vray SU 1.48.66 up, Photoshop.
Step1: Loading the Smart Tree in SketchUp
Assuming you already exported and loaded the smart tree into SketchUp. If you hit render using Vray, this will be the result.
Step2: Tick "Use color texture as transparency"
The new Vray SketchUp version (1.48.66 up) supports transparency maps like tiff or png files. All you have to do is to tick "use color texture as transparency".
Here is the render with "use color texture as transparency" on
Step 3: Editing the leaves material
With SketchUp8, you can automatically link Photoshop. To do that you nee to go to
"System Preference/ Application and choose Photoshop.exe
You can now automatically open Photoshop in SketchUp.
In this case, I wanted to Edit the leaves material with another material. I used Google to search for leaf texture.
I choose the maple leaf and loaded it into another Photshop layer. Then I manipulated the texture "Copy, paste, rotate., resize". Here is the screen grab of the finish image.
Note: I am adding this additional step Here. You need to merge visible and exit. Photoshop will ask you, do you want to save the file. Click yes! This image will be saved still in png format and will save. This file will be saved in the TEMP file and will be renamed with the word "extracted".
Once saved, the new leaves will be automatically updated in SketchUp. Here is the rendered image.
Next, I tried it with another leaf type. Here is the render.
And here is the combination.
Cheers! Nomeradona
Labels:
nomeradona,
photoshop,
sketchup,
smart tree,
Tutorial
Saturday, 27 August 2011
Tutorial: How to Model tent roof structure
Many people are scared of using SketchUp when it comes with modeling curve structure. For me all the curve structures can be actually modeled even with the basic SketchUp's Sandbox tool. I decided to use video on this particular tutorial. This is actually my first video tutorial.
Youtube
Youtube
Labels:
roof structure,
sketchup,
Tutorial
Wednesday, 24 August 2011
Sketch Up Ur Space August 2011 Edition
SketchUp Ur Space August 2011 Edition was released. Andrew Telker is the main guy. Jim Legitt and Nomeradona's tutorials were also included. Visit SketchUp UR Space here. Or download their PDF file.
Subscribe to:
Posts (Atom)
Bedroom Interior Rendering