Search

Custom Search
Wednesday, 28 September 2011
Clay render with lines and bumps
I am experimenting on how to incorporate clay render with lines and bumps. Here is my first try.

Monday, 26 September 2011


Sunday, 25 September 2011
Tutorial: How to Deal with Faceted Arcs and Circles in SketchUp and VraySU
The Arc Tool
Let me start with Arc tool. The default side for arc tool is 12 sides.

The faceted sides are very obvious when you draw the arc.

But using entity info, (window/entity info) or using Shift+I in the keyboard you can change easily the number of sides. Below, I click the arc and change it to 36 sides. You will see the arc is much smoother.

Or if you don't want this way, you can specify the number of sides in the measurement box before drawing the arc. Click the arc tool and enter the number of sides, say 36, then enter. This time the number 12 (the default) changed into 36. When you draw the arc it will have 36 sides.


The Circle Tool
For the circle basically the same principle will be applied. Circles had default sides of 24.


Now follow the same procedure with the arc to create a smoother circles.
How Arcs and Circles render in Vray SketchUp
Here is a simple scenes that shows 4 cylinders. The cylinder from left to right have the following number of sides; 12, 24, 48 and 100 respectively.

Here is the rendered image.
We could only notice a big difference between the first cylinder and the other cylinders.(soften edges 20degrees)

The above rendered image. Soften edges is 20.0 degrees

Let us change the soften edges to 60 degrees. You can do this by selecting the cylinders and then access soften edges by going to Window drop down menu.
Note: I suggest do not go beyond 100 degrees.
Once the soften edges had been increased to 60 degrees, the render below shows that there is not much differnce between 12, 24, 36 and 100 sides.

Faceted Arcs
How about those faceted Arcs? Below shows the wireframe of the model. Arc in the first model is 12sides arc, tube 24 sides. Second model has an arc and circles with 48 sides.

Here is the render.

Here is another render. Here I am proposing a solution. By increasing the obvious arc into 48 edges, but making the diameter of the pipe with lesser sides (12) and using soften edges tool (60 degrees atleast), you can have a smooth looking cylinders. Both of the models below have 12 sides circles, but the difference is the arc. The arc for the left model is 12 sides while the arc for the right model is 48.

Cheers! Hope the tutorial is helpful.
Nomeradona
Wednesday, 21 September 2011

Monday, 19 September 2011

Sunday, 18 September 2011
Tutorial: How to create Pool Water in Vray Sketchup
I want to share my latest tutorial: How to create Pool water in Vray SketchUp. I do hope in this tutorial, you will not only learn about the Vray pool water material, but also how the UV mapping works in Vray SketchUp. I will also touch base about "effected material" in clay rendering.
Here is the model I will be using in this tutorial "Barcelona Pavilion" design of course by Mies Van Der Rohe. This was modelled by Fernando Perez Alvarado.
We are using this model in our September 2011 Challenge at Sketchup Vray Artist Facebook Group. If you have Facebook account and want to view some of the entries and join this group, Click HERE. Be mindful, this group was intended originally for the Filipinos who are using SketchUp; therefore from time to time, local dialect is used. But don't worry, the members are accommodating; if they knew you are a non-Filipino, they are more than willing to respond and talk with you in English.
Here is the setup view of the model that I will be using. I will render in clay rendering, only the water and pebble materials will not be effected by the override material function. If you want to do clay render in Vray SketchUp, go to the global switches in the Vray options and tick override materials.

Step 1: The Diffuse Layer
1.1. Here is the displace map that I will be using here. It is a seamless texture I made with Pixplant. You can copy this image and use it personally.

1.2. Here I applied the map in my water material using SketchUp

1.3. Once satisfied with the mapping scale, you can turn the opacity to zero (0)- meaning it is full transparent. Vray SketchUp will use the UV map of the top diffuse layer. So if we add displacement height, the displaced map will follow the UV of this layer. There are two ways how to adjust the map's opacity.
a. by SketchUp Material Editor

b. by Vray Material Editor. White color in the transparency slot means 100% transparent.

Step 2: The Reflection Layer
I added Fresnel Map on the reflection layer, with an Index of Refraction (IOR) value of 1.33

Step 3: The Refraction Layer
For me this is one of the most important layer that anyone should focus when dealing with water material. Under refraction, I will share the three main items for this material: Tranparency, IOR and Fog Color.

3.1. IOR Value.. in the IOR value (see the image above), I used 1.33. This is the IOR value of water.
3.2. Fog Color. Fog color controls the color basically of your water material. If you want an effect of pristine water for resort pools, then you might want to use light turquosie or light blue color tints. If you want a bit murky water, then use ochre to brownish shades.
The color multiplier, controls the thickness effect of the color. higher value makes the color more intense. For me my multiplier will vary from .01 to .03. If you want the shadows to pass through then you need to tick, affect shadows. If you want the color to pass through (like in stained glass) then you need to tick affect alpha.
ok let say, I will choose this fog color (RGB 184,174, 124)

Here is the render. Note: In this render I have added displacement, and grayish transparency color

If I want greenish color, I might choose this color

Here is the render using greenish color.

3.3. Transparency color.
Usually, it so hard to see what is happening below the surface, especially when using high displacement value and reflective valuer. If you want to see the material below, in this case the pebble rocks, you should learn how to adjust this. I have seen water that looks like metal or sea water, because this one was 100 percent white.
Here is an example. This one looks like seawater. (This render has displacement value of 1.0 and transparency color of white)
In the Barcelona Pavilion, the pebble surface is quiet near to the water surface, therefore the pebbles will be surely noticed. TO see the texture at the bottom, first you need to make the displacement lower and second you need to use medium to dark gray color in the transparency rollout. Below, I adjusted the transparency color with an RGB value of 81,81,81.

Here is the render (without displacement)


Step 4: Displacement
To create waves and ripples, all we need to do is to add displacement map. Be sure your face geometry for your water is grouped. If not, no displacement will occur. Here I used the same dmap , I used in the diffuse layer.

Examples of displacement settings. Note: Vray uses inches in displacement. 1 means 1 inch.
Displacement amount 0.1

Displacement amount 0.5

Displacement amount 1.0

Bonus: Effected by Override Material
If you want the material not to be effected when overriding material (for clay rendering) all you have to do is untick "effected by Override Material" under option.

See some of my WIP renders in this challenge using this tutorial. DAY 1, DAY 2. I have not updated it.
I hope this is useful.
Nomeradona
Friday, 16 September 2011
Mini Tutorial: How to correct those jumbled mapping in SketchUp
Hi folks,
I am very busy yet I missed writing and sharing my tutorial. In order to balance, I decided to write mini tutorials which are some of the frequent questions I receive by mails. Let's begin with this one.
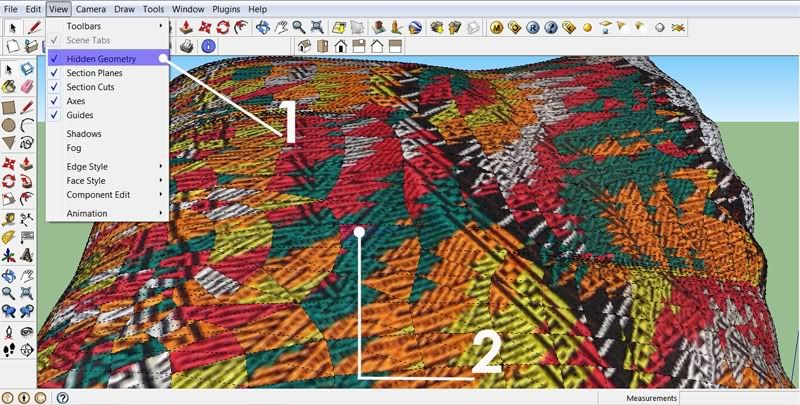
Have you ever experience mapping an organic curve surface ending up with jumbled texture like the image below?
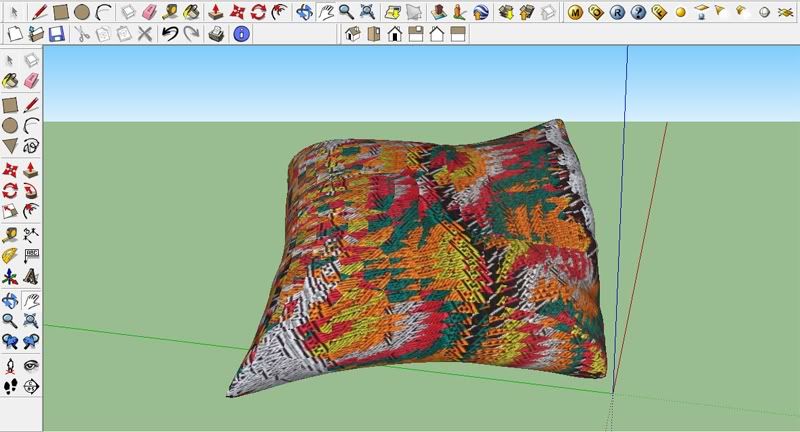
Well this is very easy to fix in Google SketchUp. Here are the following steps.
Step 1: Click Hidden geometry, and select any face,
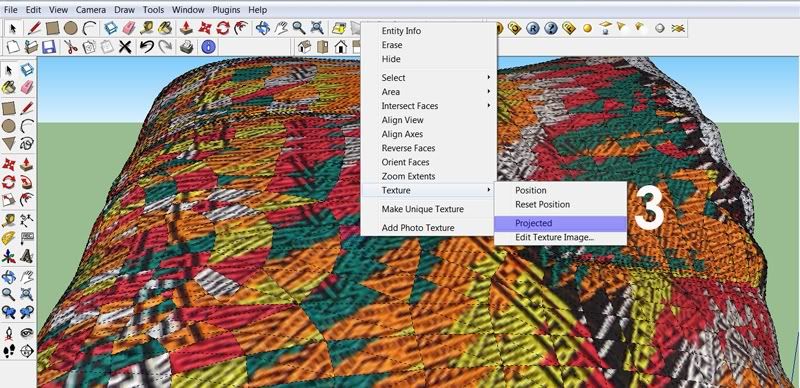
Step 2: Using the mouse, right click then select texture. Tick projected image.
The particular mapping type of that face is projected mapping.
Step 3: Select the paint bucket. Click the sample paint icon (eyedropper) and select the face with projected mapping.
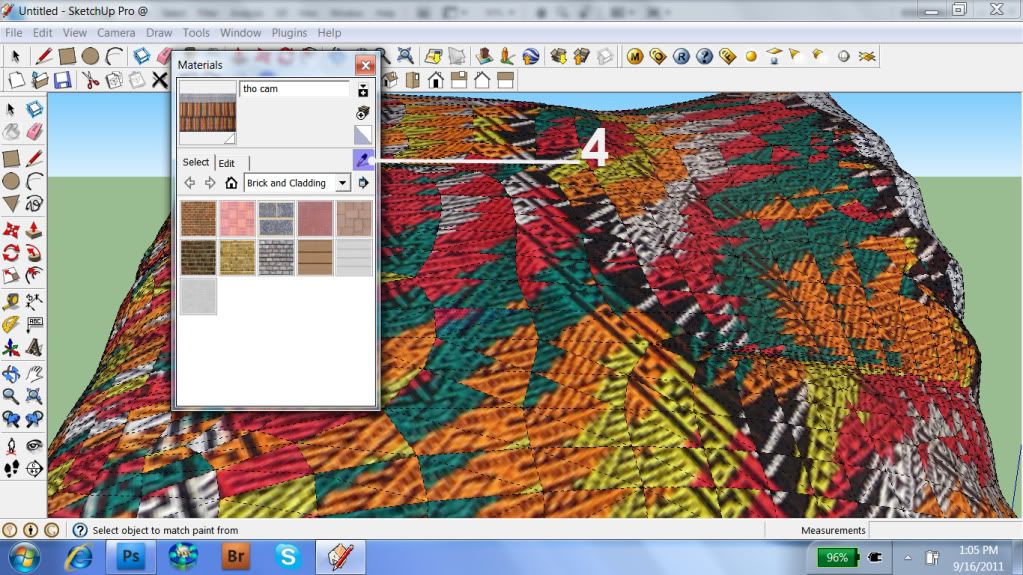
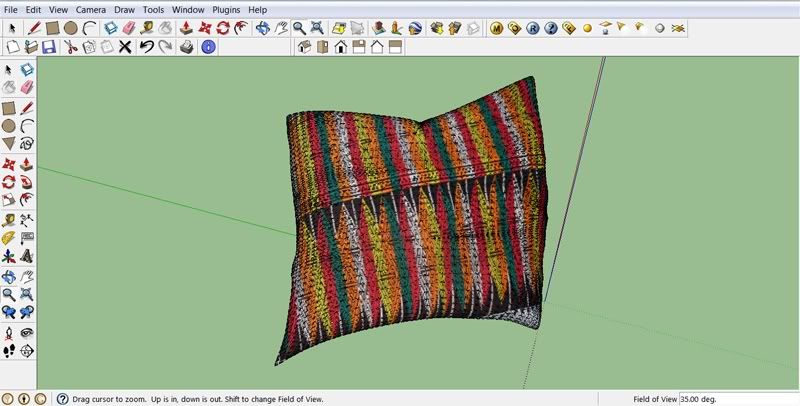
Step 4: Once resampling was done. Click anywhere to the surface by pressing eithe Shift or Control at the same time (Click + shift) of (Click + Ctrl). That's it!
I am very busy yet I missed writing and sharing my tutorial. In order to balance, I decided to write mini tutorials which are some of the frequent questions I receive by mails. Let's begin with this one.
Have you ever experience mapping an organic curve surface ending up with jumbled texture like the image below?

Well this is very easy to fix in Google SketchUp. Here are the following steps.
Step 1: Click Hidden geometry, and select any face,

Step 2: Using the mouse, right click then select texture. Tick projected image.
The particular mapping type of that face is projected mapping.

Step 3: Select the paint bucket. Click the sample paint icon (eyedropper) and select the face with projected mapping.

Step 4: Once resampling was done. Click anywhere to the surface by pressing eithe Shift or Control at the same time (Click + shift) of (Click + Ctrl). That's it!

Wednesday, 14 September 2011
Sketchup Script:: Flattery Tool
As a practicing artist and teacher,I am always exploring how to incorporate Google SketchUp with Visual arts. I have dons paintings where I used rendered image as inspiration. This time, I have included my SketchUp printed layout as collage material in painting. I am also looking on how to create digital collage and SketchUp output into a composition; and also I am looking on the possibility of charcoal drawing with printed rendered image or SU 2d plans.
This morning, I came across with this pluggin at Sketchucation.com "Flattery Papercraft Tools" written by which can be downloaded for free HERE. This script help to unfold sketchup model into flat surface.. Wow. I could see immediately the impact of this model with education and 3D Art. Now with this its possible to model something in SketchUp and create an actual 3D model....

This morning, I came across with this pluggin at Sketchucation.com "Flattery Papercraft Tools" written by which can be downloaded for free HERE. This script help to unfold sketchup model into flat surface.. Wow. I could see immediately the impact of this model with education and 3D Art. Now with this its possible to model something in SketchUp and create an actual 3D model....
Monday, 12 September 2011
Thursday, 8 September 2011
Barcelona Pavilion Day 2
Today, I am very busy with my online class. Therefore I have to multi-task. Rendering while reading online assignments. Here is my experimentation for today. I have change the floor. I use Pixplant to create and copy some of the materials of the Barcelona Pavilion I gather from the net.
I am happy with the water material. I tried to replicate the water material and using some of the reference photos of this Pavilion. I also began to treat the concrete material.This is the original output with no post processing.

I am happy with the water material. I tried to replicate the water material and using some of the reference photos of this Pavilion. I also began to treat the concrete material.This is the original output with no post processing.

Work in Progress: Barcelona Pavilion
I decided to document this experimentation.
This model can be downloaded at the 3D warehouse. Barcelona Pavilion, originally designed by the German-born architect Ludwig Mies van der Rohe's, was the German building used for the 1929 International Exposition in Barcelona, Spain. This was modeled by Fernando Perez Alvarado.
Here is my very first render base completely on the model. I just treated the water and made material clipmaps for the palm leaves.

I like the water, but it looks like a resort pool water. I searched for some of the available pictures on the net and I found these.


 ~ Carlos Lorenzo - Barcelona Photo Blog.
I realized that the model, my render are far far from the original edifice. Here is my challenge. How to achieve or even close with the original.
Here I redid my water and added some concrete I made with Pixplant using the models images. Original output (no color correction)

This model can be downloaded at the 3D warehouse. Barcelona Pavilion, originally designed by the German-born architect Ludwig Mies van der Rohe's, was the German building used for the 1929 International Exposition in Barcelona, Spain. This was modeled by Fernando Perez Alvarado.
Here is my very first render base completely on the model. I just treated the water and made material clipmaps for the palm leaves.

I like the water, but it looks like a resort pool water. I searched for some of the available pictures on the net and I found these.


I realized that the model, my render are far far from the original edifice. Here is my challenge. How to achieve or even close with the original.
Here I redid my water and added some concrete I made with Pixplant using the models images. Original output (no color correction)

Subscribe to:
Posts (Atom)
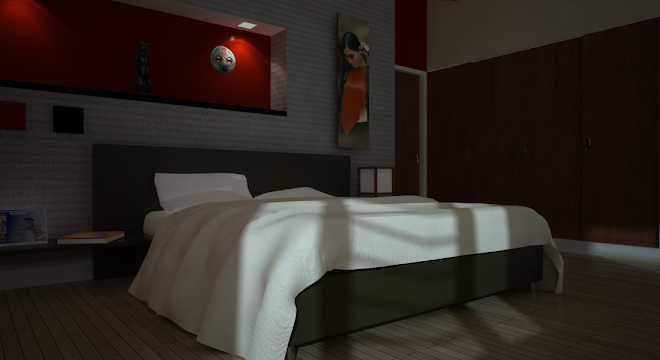
Bedroom Interior Rendering